Batch Resize
There are many tutorials out there to resize images in bulk on youtube. I have found a few that get me close to my goal, but they don’t quite hit all the points or solve my problem. I needed to resize hundreds of product photos from the vendor and these images came in all orientations and sizes. The goal was to create a batch resize process that would output all of them to a square 800×800 pixel 72 dpi image. Not only so that it can load quickly and be viewed online, but also because we needed to adhere to the google requirement for product photos.
Starting Point Tutorials
- Photoshop: How to batch process a folder of images using Actions by RC Concepcion timestamp (1:30 – 7:45)
- Teaching point: Automate Batch
- How to Batch Resize Photos in Photoshop in Only 2 Minutes by PHLEARN timestamp (1:15 – 325)
- Teaching point: Image Processor
Steps
Organize Photos with in a Single Folder
Find the images you need to process and make sure they are only in one folder, or note that you will need to process each directory separately.
Open a Test File and Create a New Action
To get to the actions panel click on Window and click Actions to add it to your workspace, if it’s already checked it should appear on the right toolbar. Click the New page icon to create a new Action and Name it something that allows you to remember what it is. My Action will look like the visual below when I’m done, notice the circle below is red, which means it is recording whatever you are doing. Click the square to stop recording, when you’re done with all the settings you want applied to each image.
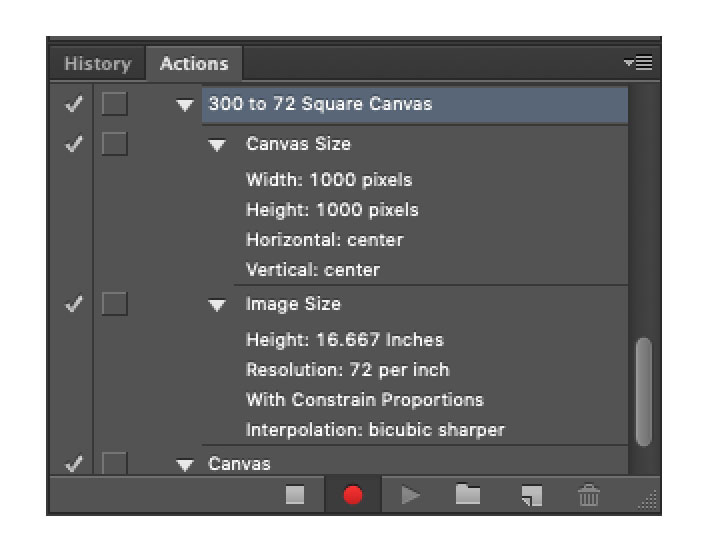
Action 1: 1000×1000 px Canvas
Once you hit record on the Actions panel with your test image open go to Image > Canvas Size and choose any square dimensions. The next step will overwrite this size, so it doesn’t matter what dimensions yet, just try to get it in the ballpark.
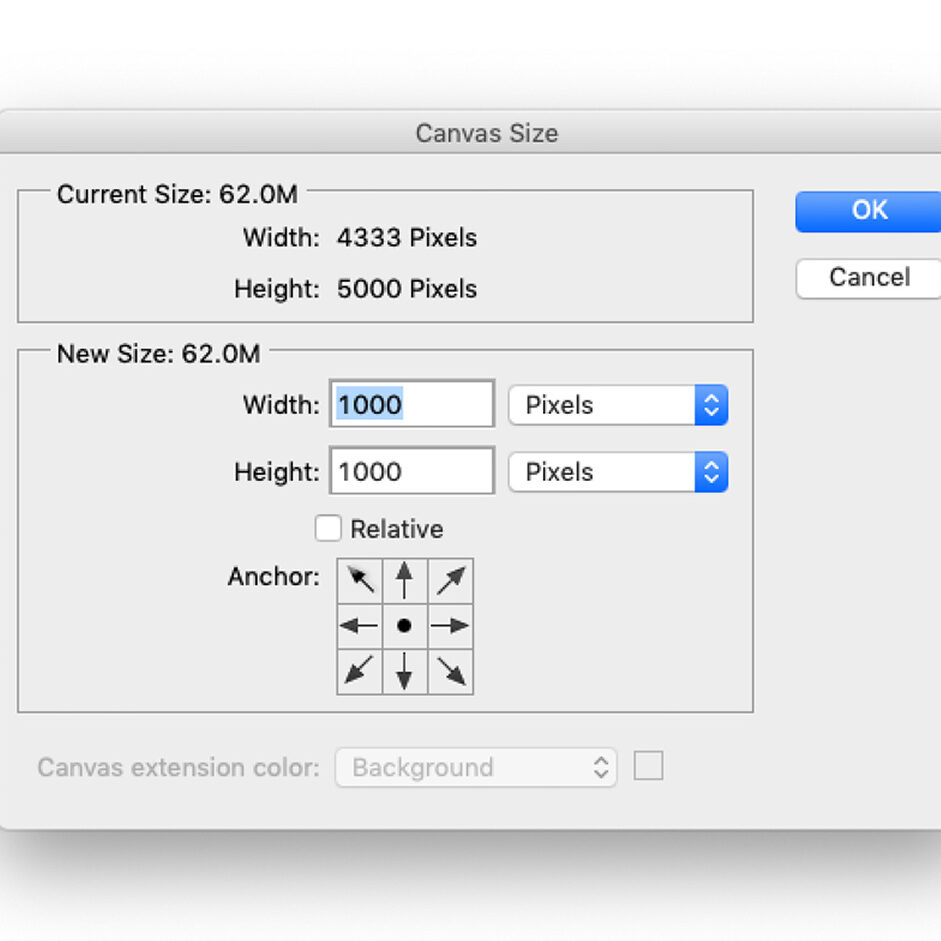
Action 2: 72 pixels per inch
Now go to Image > Image Size and set the resolution field to 72. You can also choose a width or height that will apply to all the images final size. In the example I set 1200 height, so all the images will be crunched to a final size of 1200×1200 pixels 72dpi.
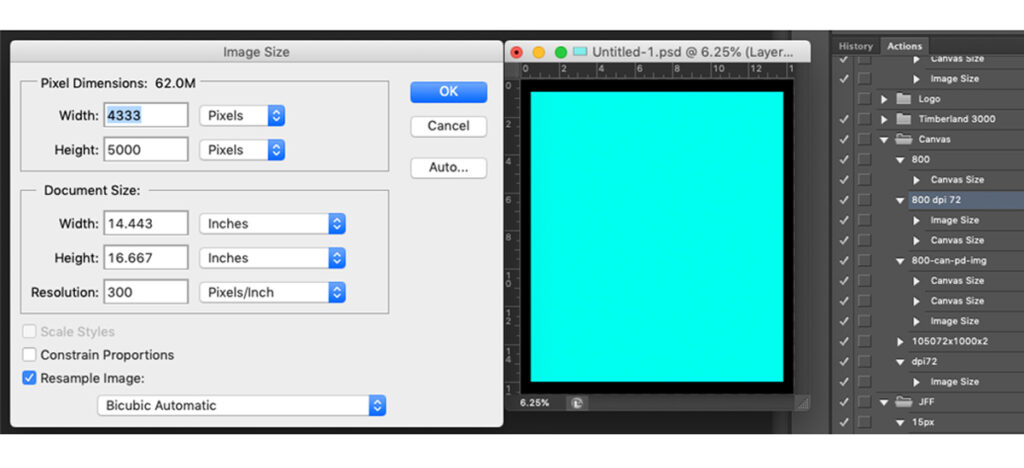
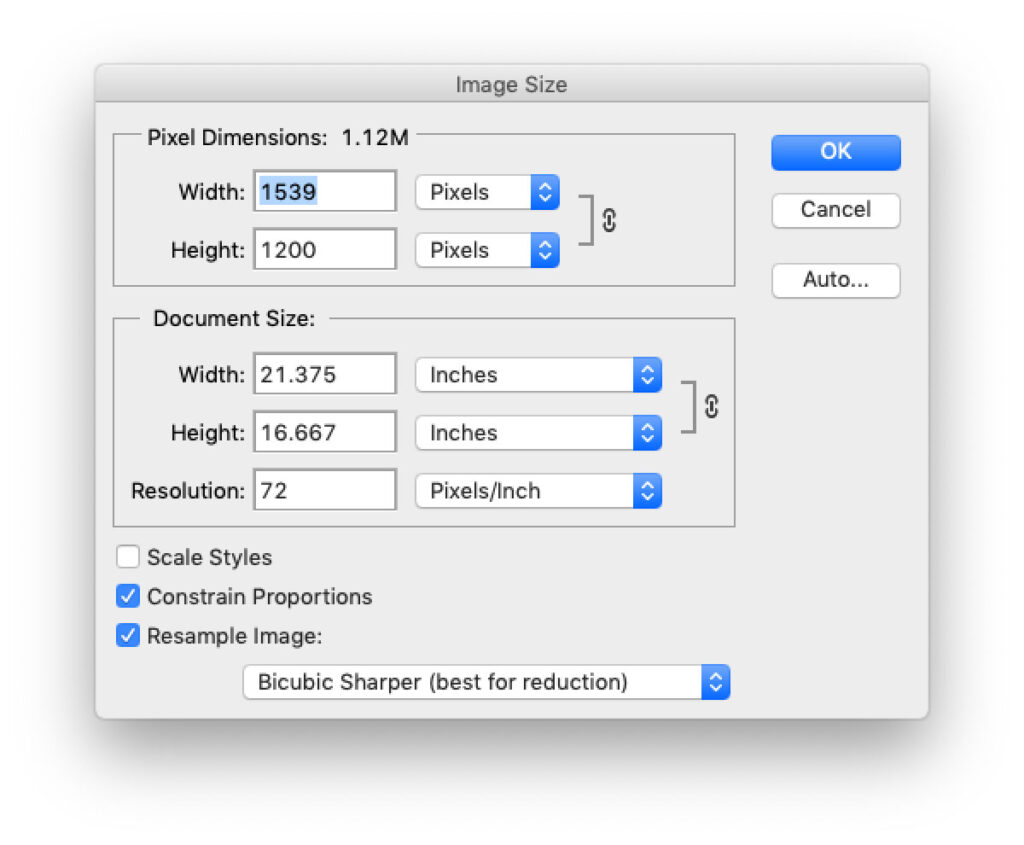
Finalize Actions and Prep Workspace
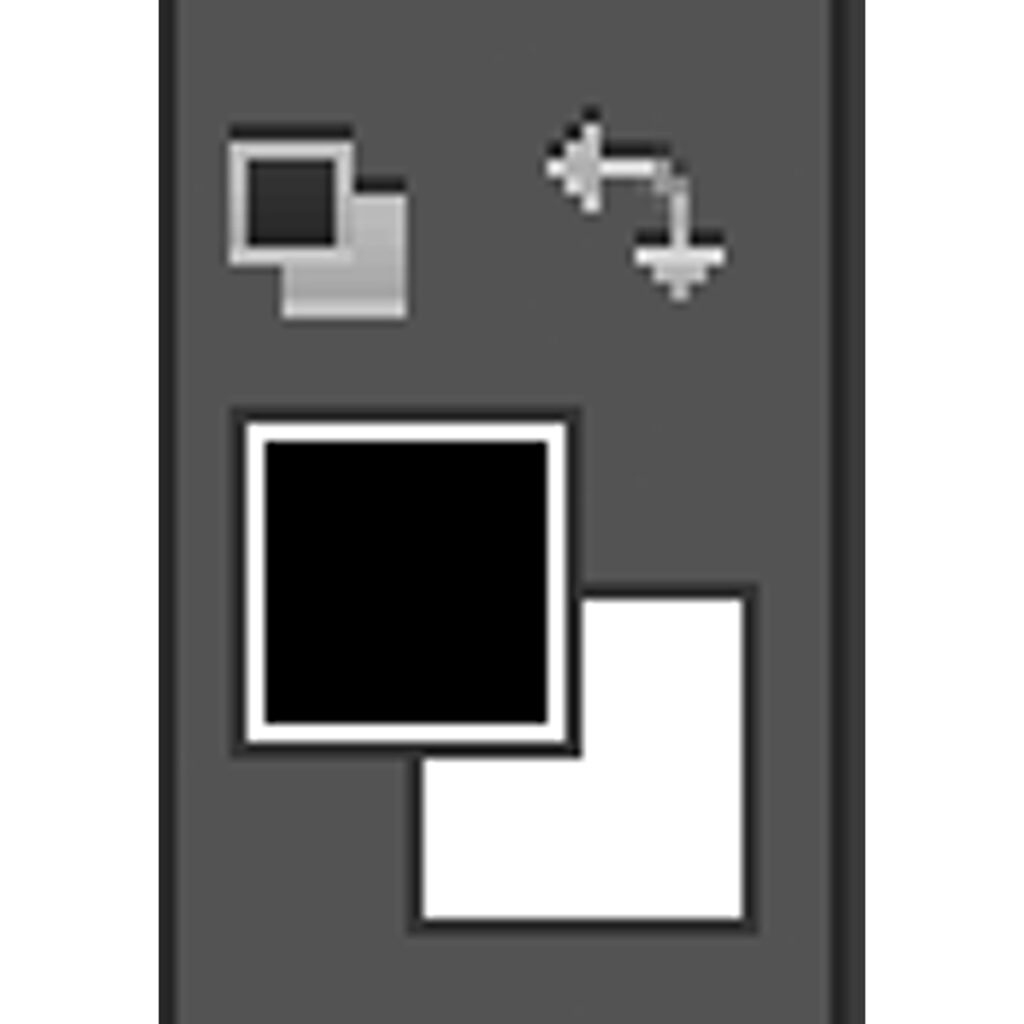
Click the Square to stop recording and close the test image. Double check your swatches are set to default so the canvas background will be White, or if you prefer a Black background press “X” to swap them.
Go to File > Scripts > Image Processor
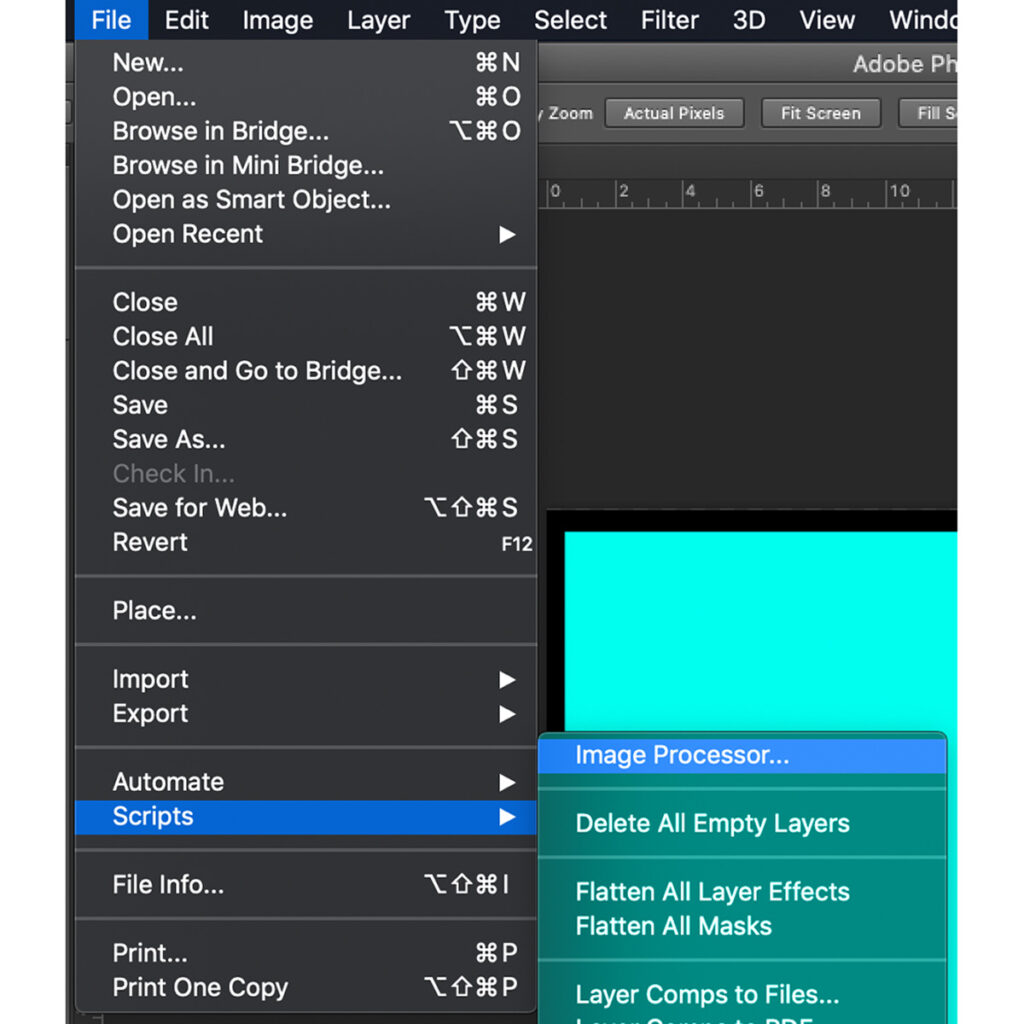
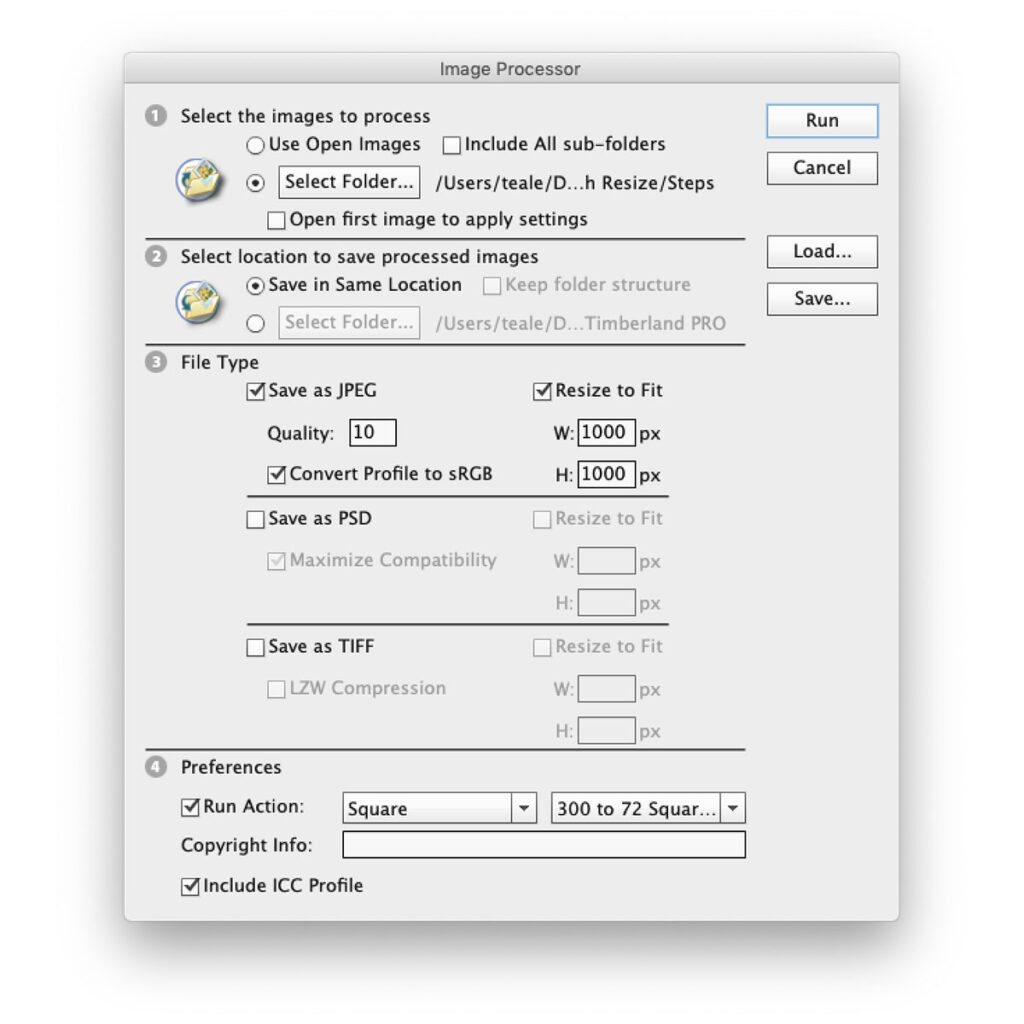
Image Processor Settings
- Choose the folder location with the images you need to process.
- Choose the output folder or choose Save in Same location.
- Choose Save as JPEG and the file output and select Resize to Fit and Convert Profile to sRGB.
- Choose Run Action and select the folder and action you created from the dropdown menus. Choose Include ICC Profile and click Run to process the images.
Find Folder named JPEG
Now all your images should appear in the output file directory you specified in the in image processor settings. Photoshop will create a folder named JPEG and will not overwrite the originals.
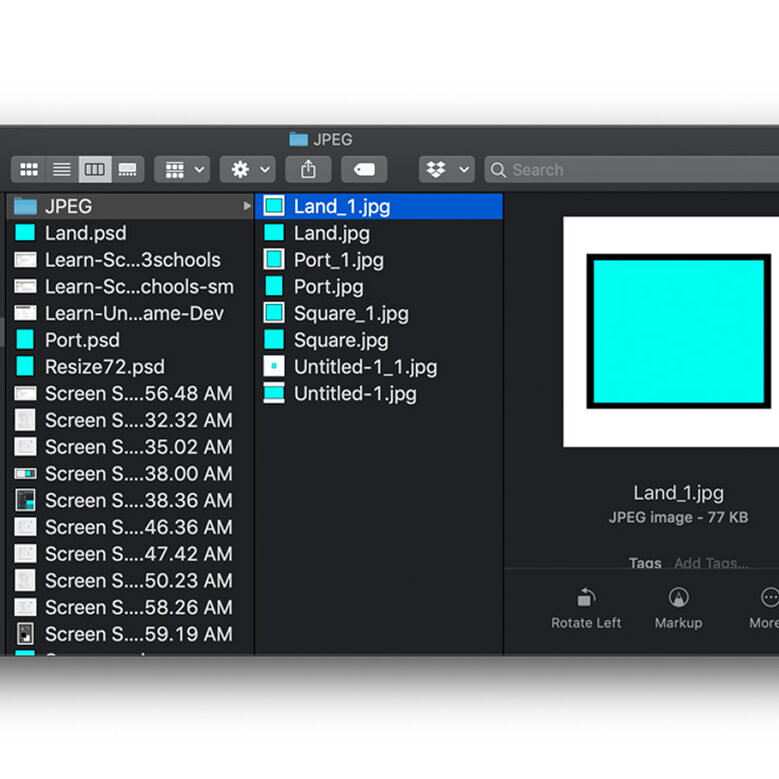
Example Output
Portrait Example 
Landscape Example 
Square Example
The Old Way also Adding Padding
Create Photoshop Actions for Each Desired Output
Create 3 Actions in the Photoshop Actions Panel, when your done it will look something like this:

Padding Action
- Open a test photo and create a new action, and name it 115 padding
- Click the record circle icon to start recording a new action. Go to Image > Canvas Size (Shortcut: Ctrl + Alt + C)
- Change the type of adjustment to percent and change both fields to 115 then click OK
- Stop the recording by clicking the Square in the bottom of the actions panel
Square Landscape Orientation Action
- Open a test photo and make the longest side 800px wide
- Create a new action, and name it sq-canvas-land
- Go to Image > Canvas Size (Shortcut: Cmmd + Alt + C)
- Change the type of adjustment to pixels and change the height to 800px tall
- This will create a square canvas 800x800px
- Stop recording
Square Portrait Orientation Action
- Open a test photo and make the longest side 800px wide
- Create a new action, and name it sq-canvas-port
- Go to Image > Canvas Size (Shortcut: Cmmd + Alt + C)
- Change the type of adjustment to pixels and change the width to 800px tall
- This will create a square canvas 800x800px
- Stop recording
Automate Batch with 115% Padding
Open images and create 115% padding
- Make sure your background color is set to white, or the color of border you want to add
- Go to File > Automate > Batch and choose the action 115 padding
- Select Folder for source and click Choose navigate to the folder you prepared and click OK

Image Processor Batch Resize with 800px Square Output
Run Script for all open images to save and resize at 800px as a PSD file, in the same location in a new folder called “PSD”
This is only a good method for images bigger than 800x800px (another action could be made for images that are smaller than 800x800px).
- Go to File > Scripts > Image Processor and Select the following options:
- Use Open Images
- Save in Same Location
- Save as PSD | Maximize Compatibility | Resize to Fit W:800 & H:800
- Include ICC Profile

Image Processor Batch Resize Landscape to Square Output
Run Script for all landscape orientation images to save as a square image 800x800px
- Go to File > Scripts > Image Processor and Select the following options:
- Click Select Folder choose the folder with all the landscape photos in the newly created PSD folder
- Save in Same Location
- Save as JPEG | Quality: 10 | Convert Profile to sRGB
- Run Action choose sq-canvas-land | Include ICC Profile
- When you Run the script a new folder will be created inside the folder with all your images. It will be called “PSD” organize your photos into 3 different folders.
- Square photos DONE folder
- Landscape photos LAND folder
- Portrait photos PORT folder

Image Processor Batch Resize Portrait to Square Output
Run Script for all portrait orientation images to save as a square image 800x800px
- Go to File > Scripts > Image Processor and Select the following options:
- Click Select Folder choose the folder with all the portrait photos in the newly created PSD folder
- Save in Same Location
- Save as JPEG | Quality: 10 | Convert Profile to sRGB
- Run Action choose sq-canvas-port | Include ICC Profile

